![OCI — Console Auth via Azure SAML SSO [Part 2]](/images/blog/oci-unified-authentication-with-azure-identities-part-1/featured.png)
This guide walks through configuring SAML SSO between Azure Entra ID and OCI, so users can sign into the OCI Console using their Azure identities.
Organizations using Active Directory on-premises can extend that identity management to OCI through Azure Entra ID integration. Users authenticate to the OCI Cloud Console while keeping Entra ID as their primary authentication provider via federated authentication.
Critical Requirements:
- User and group objects must exist in both Azure Entra ID and OCI IDCS (Identity Cloud Service)
- User provisioning from Entra to IDCS is necessary for synchronization
OCI Architecture Note: OCI transitioned to a new Domain model that incorporates IDCS directly into cloud tenants, replacing the previous separate service model (similar to Azure's infrastructure-identity separation).
Best Practice: Create separate Domains for different identity sources (production/development environments, specific providers, or applications).
Azure — Enterprise Application
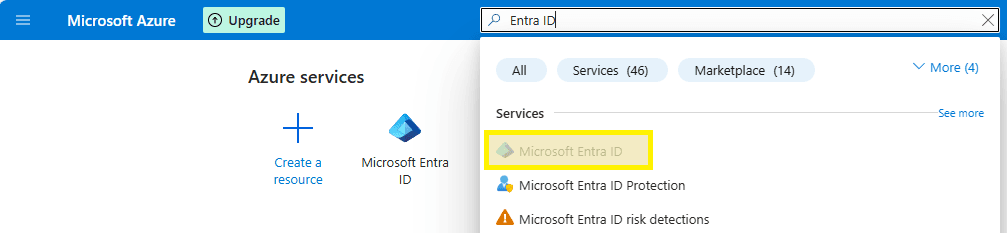
Step 1. Launch Entra ID from the Azure portal.
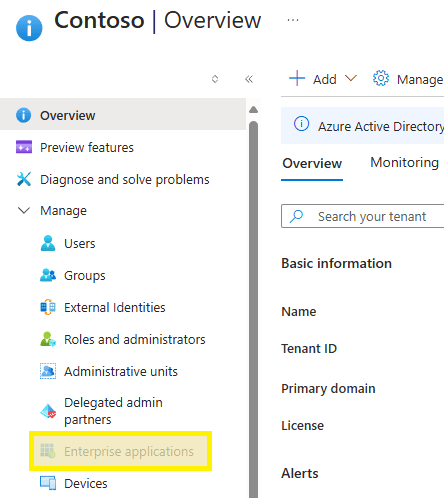
Step 2. Select Enterprise applications from the left navigation menu.
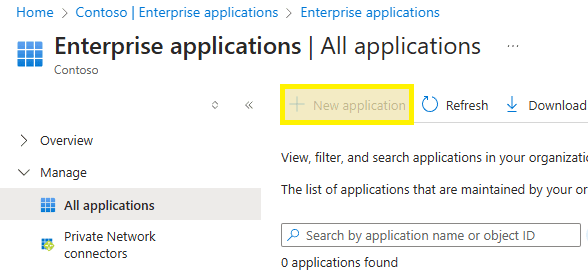
Step 3. Select the New Application option.
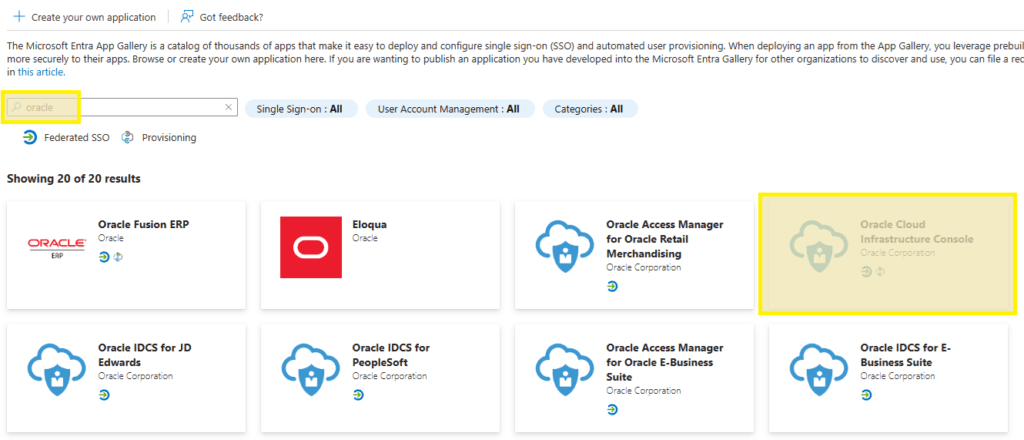
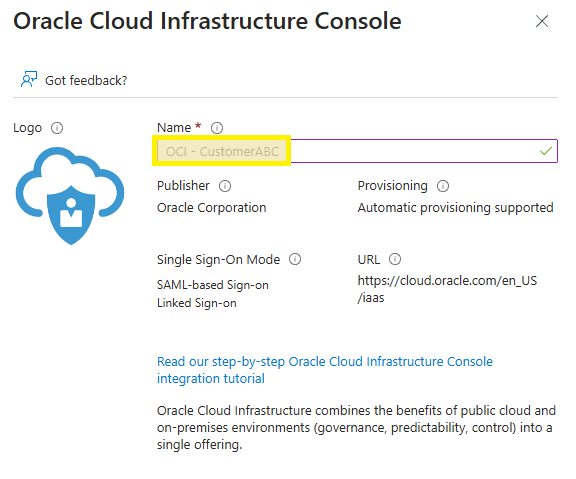
Step 4. Search for "Oracle" and select Oracle Cloud Infrastructure Console.
Step 5. Enter your preferred name and click Create.
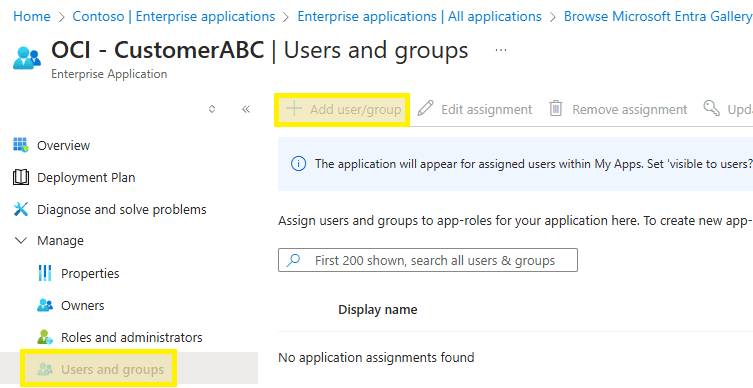
Step 6. Select Users and groups from the menu, then Add user/group. Find and select your tenant or functional AD group and click Assign.
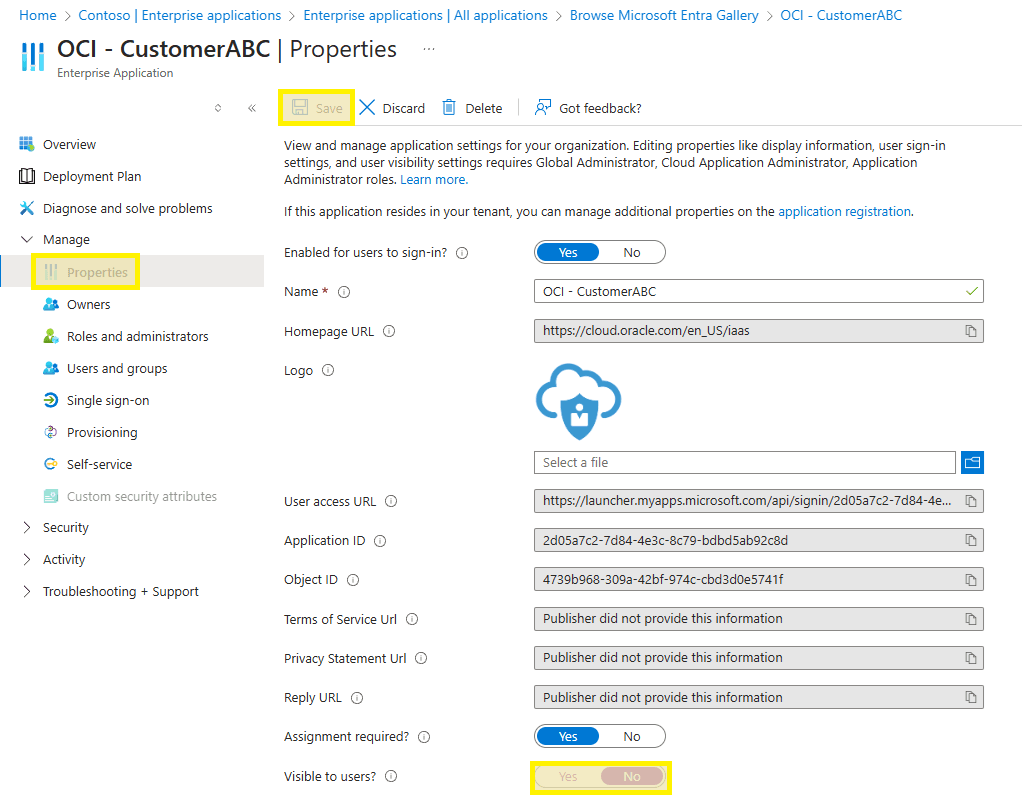
Step 7. Go to Properties in the left menu, disable application visibility for users, and Save.
OCI — Tenant Metadata
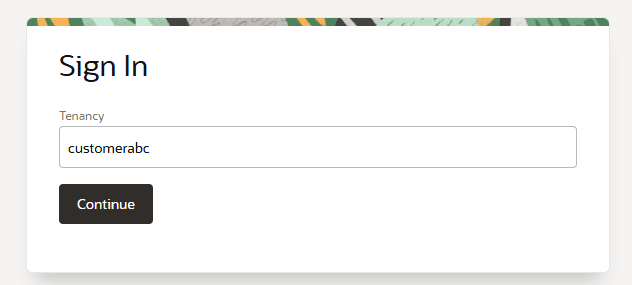
Step 1. Navigate to https://cloud.oracle.com and input your tenant name.
Step 2. Authenticate using a local tenant administrator account (typically the Default domain for newly created tenants).
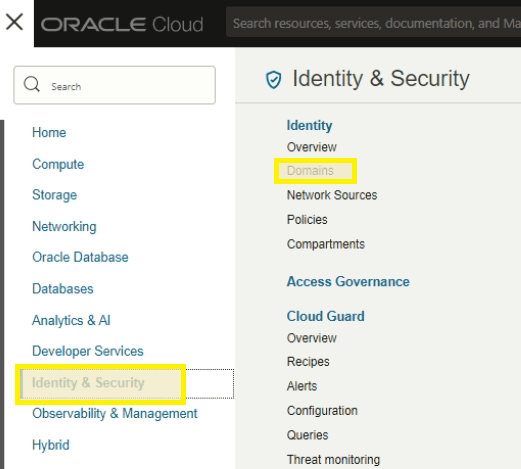
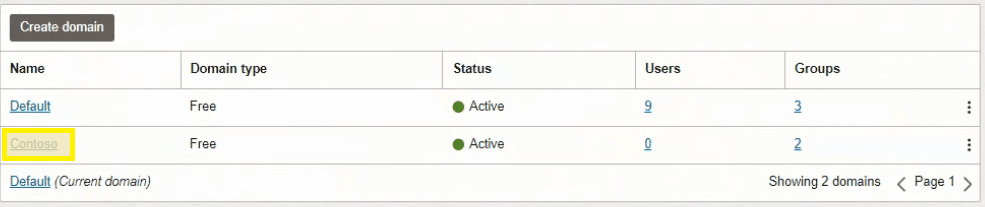
Step 3. Access the Domains section from the top-left navigation menu.
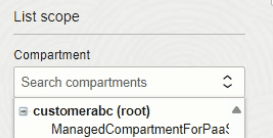
Step 4. Expand the root compartment dropdown on the left sidebar.
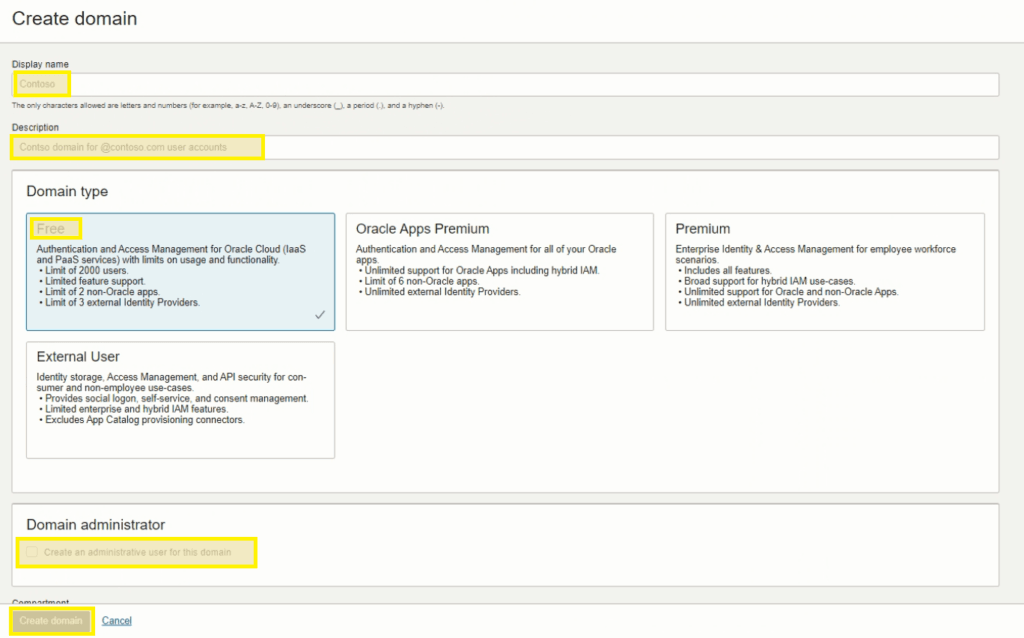
Step 5. Select the Create Domain option.

Step 6. Enter domain details and create the domain.
Step 7. Access the domain once provisioning completes.
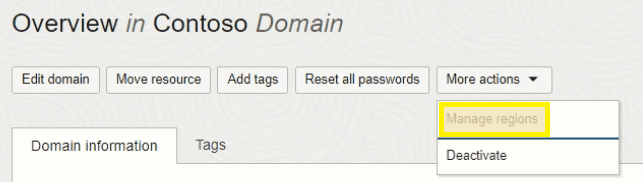
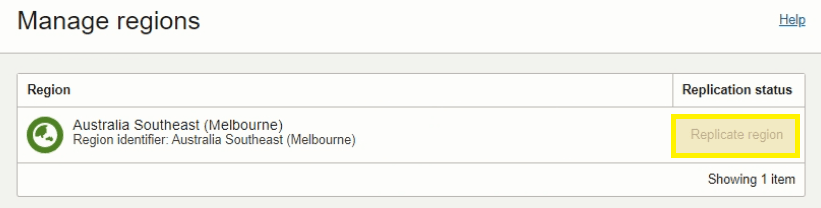
Step 8. For DR-configured tenants, enable domain replication. Select More actions and choose Manage Regions. Verify replication is enabled to your secondary DR region.
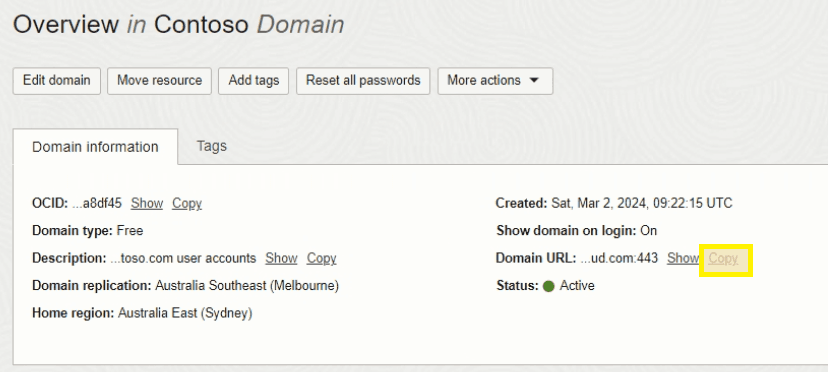
Step 9. Record the Domain URL for future reference.
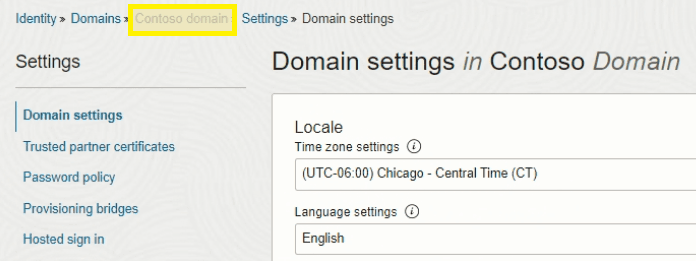
Step 10. Access Settings from the left navigation menu.
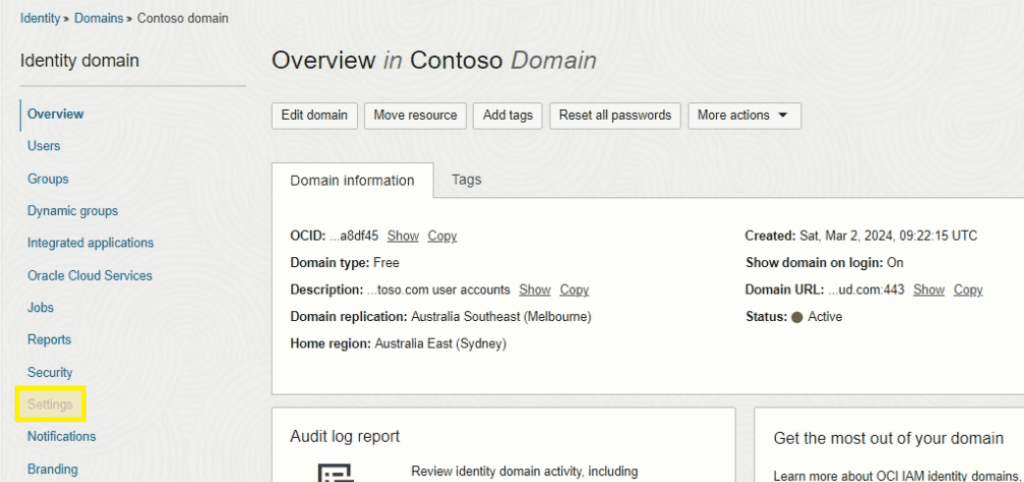
Step 11. Enable Configure client access and save. (This temporarily exposes the metadata endpoint — we'll disable it right after.)

Step 12. Open a new browser tab, navigate to your Domain URL with /fed/v1/metadata appended. Right-click and save as metadata.xml locally.

Step 13. Return to Settings, disable Configure client access, and save changes.

Step 14. Navigate back to the domain page using breadcrumb navigation.
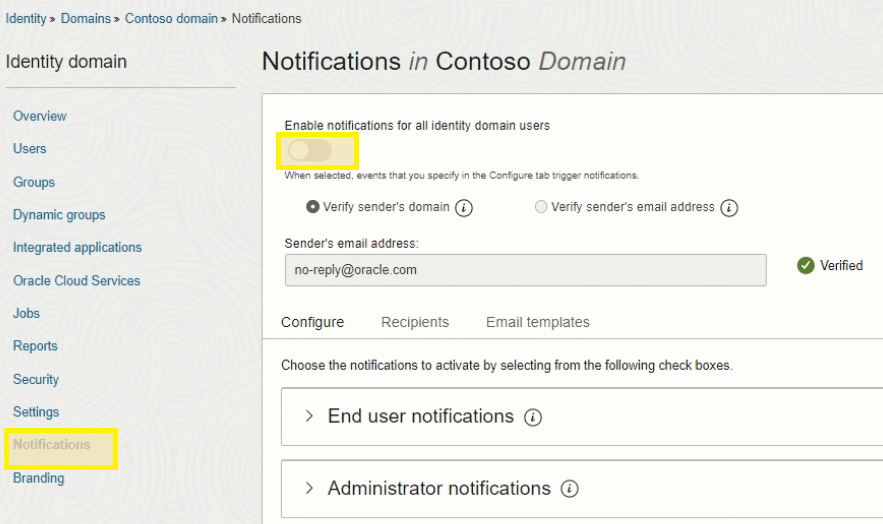
Step 15. Access Notifications and toggle off notification settings for all users.
Azure — Configure SSO
Step 1. Return to the Azure portal with the new Enterprise Application.
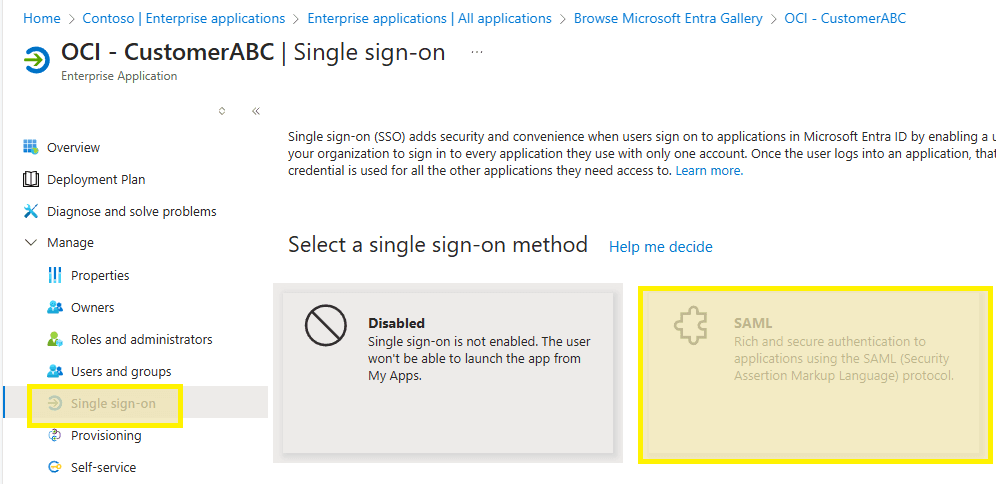
Step 2. Select Single sign-on from the left navigation and then SAML from the middle section.
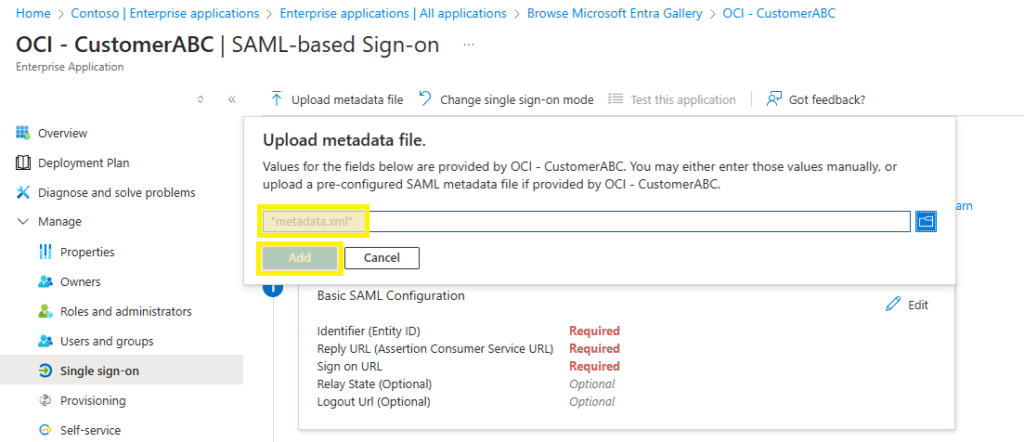
Step 3. Click Upload Metadata file at the top and select the metadata.xml file downloaded previously.
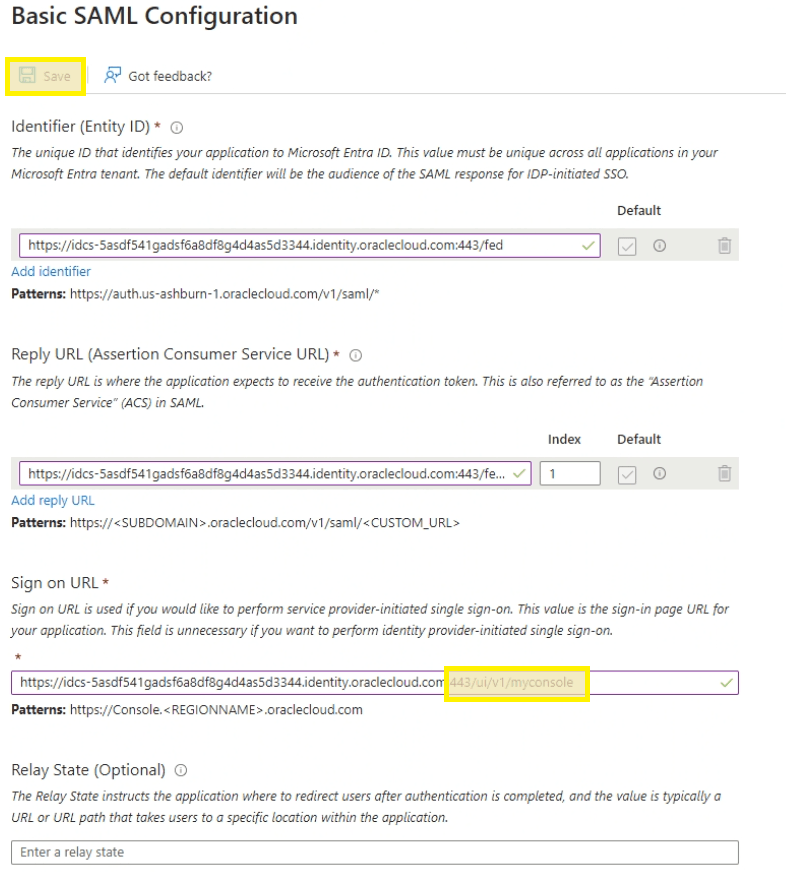
Step 4. Fill in the Sign on URL with the IDCS URL copied earlier, appending /ui/v1/myoracle to the end. Click Save at the top.
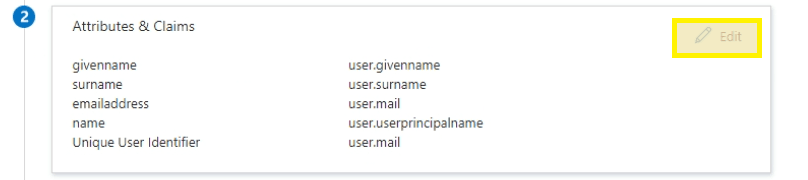
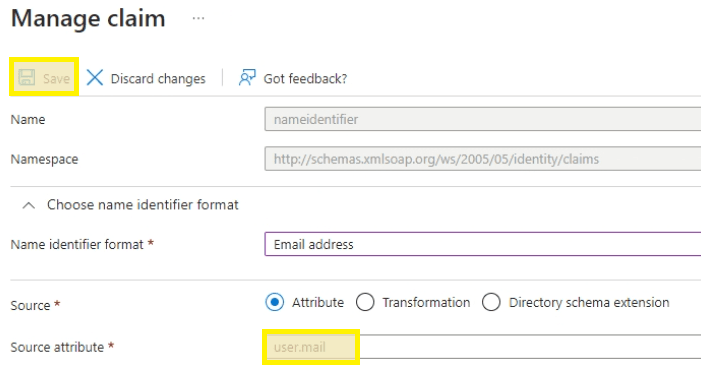
Step 5. Once updated, click Edit on the Attributes & Claims box.
Step 6. Click the default claim at the top.
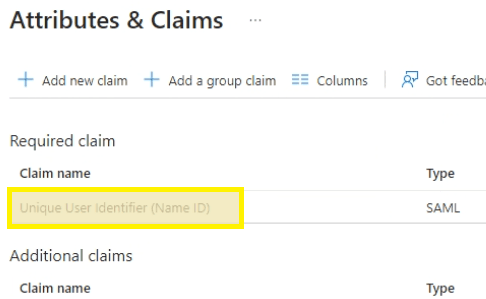
Step 7. Select user.mail for the Source attribute and then Save.
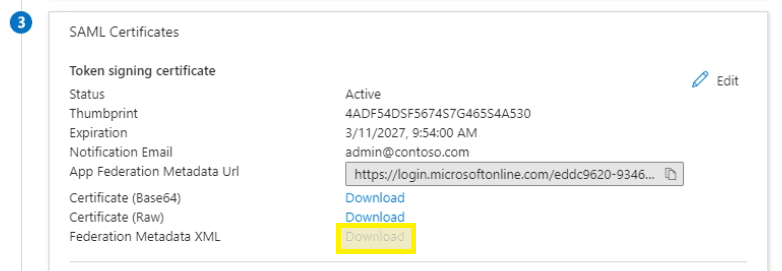
Step 8. Return to the main Single Sign-On configuration page, click Download on Federation Metadata XML and save to the desktop as CUST.xml.
OCI — Configure SSO
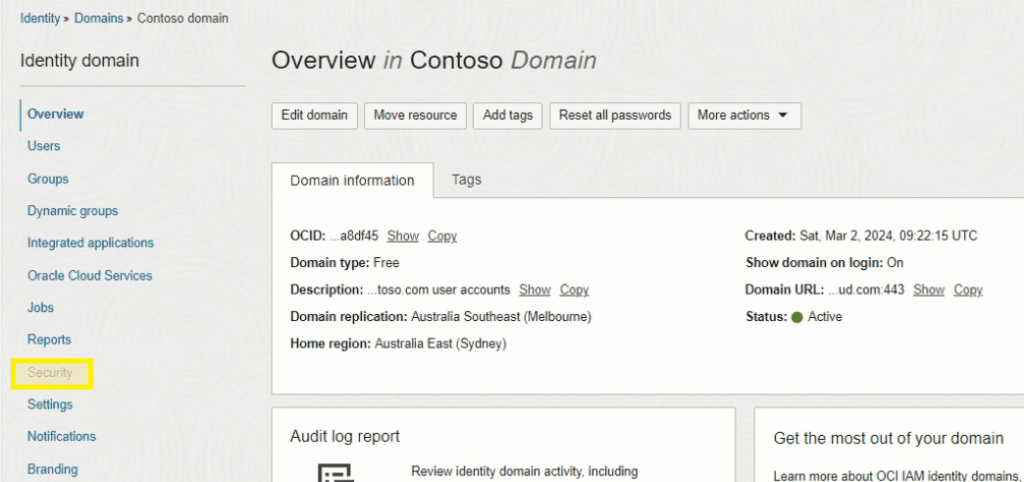
Step 1. Navigate to the OCI Overview page and select Security from the menu.
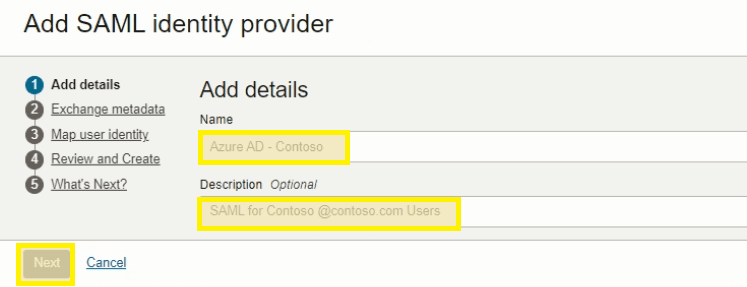
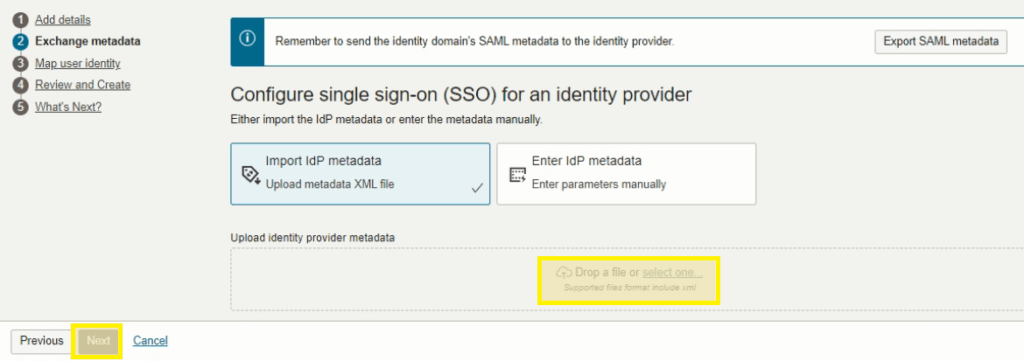
Step 2. Select Identity Providers from the left menu and choose Add SAML IdP from the dropdown.

Step 3. Complete the necessary fields and click Next.
Step 4. Search and select the previously downloaded CUST.xml file from Azure. Click Next.
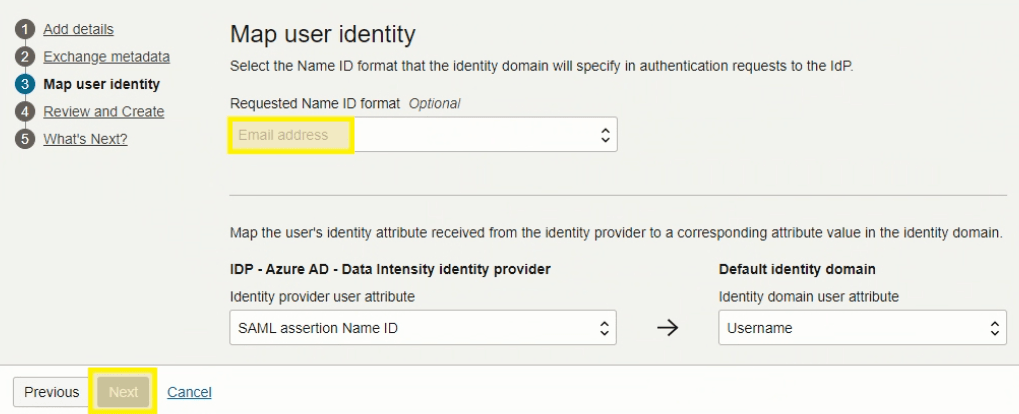
Step 5. Select Email Address for the Requested Name ID format. Click Next.
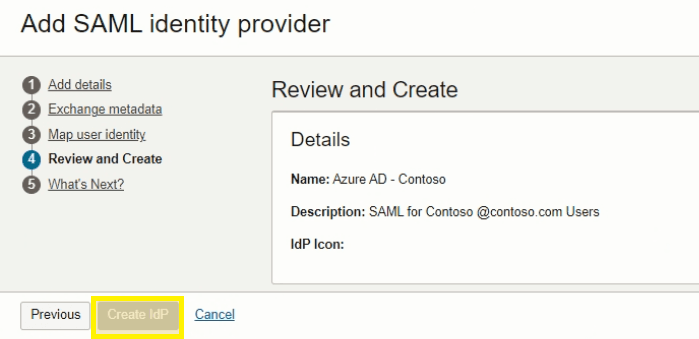
Step 6. Review all configuration details and click Create IdP.
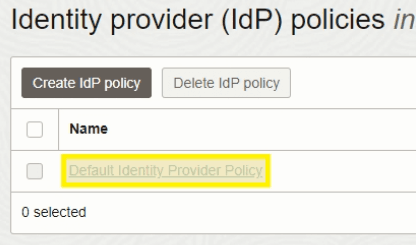
Step 7. Click Activate, then select Add to IdP policy.

Step 8. Click Default Identity Provider Policy.
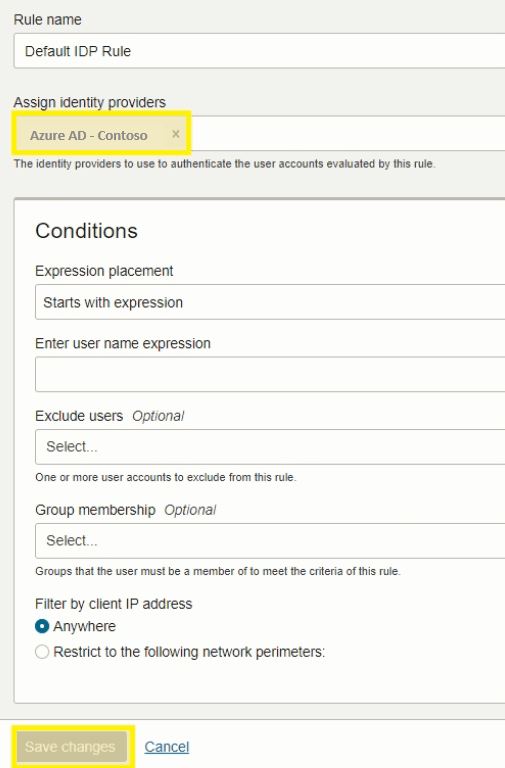
Step 9. Select Edit IdP rule.
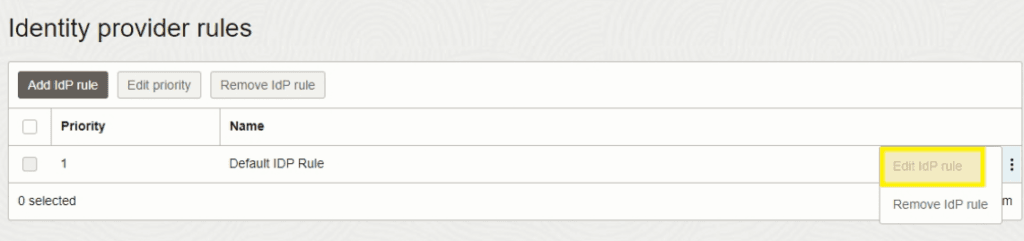
Step 10. Remove the Username-Password option, add the new IdP Azure Ad — Contoso, and Save Changes.
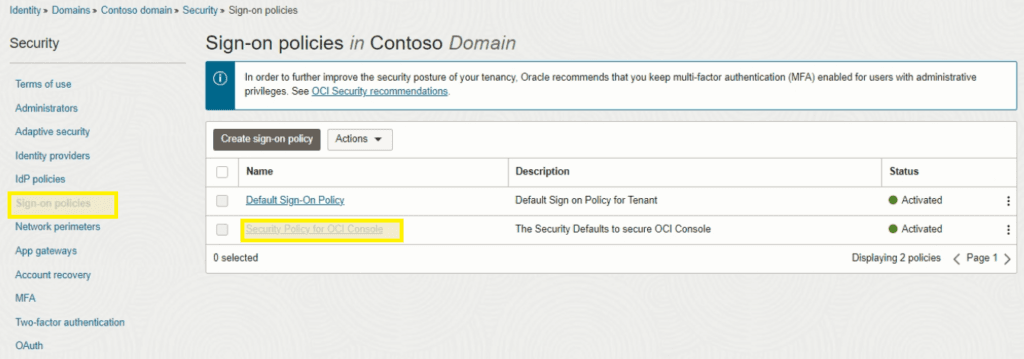
Step 11. Select the domain from the top menu and choose Security from the left navigation.

Step 12. Select Sign-on policies and open Security Policy for OCI Console.
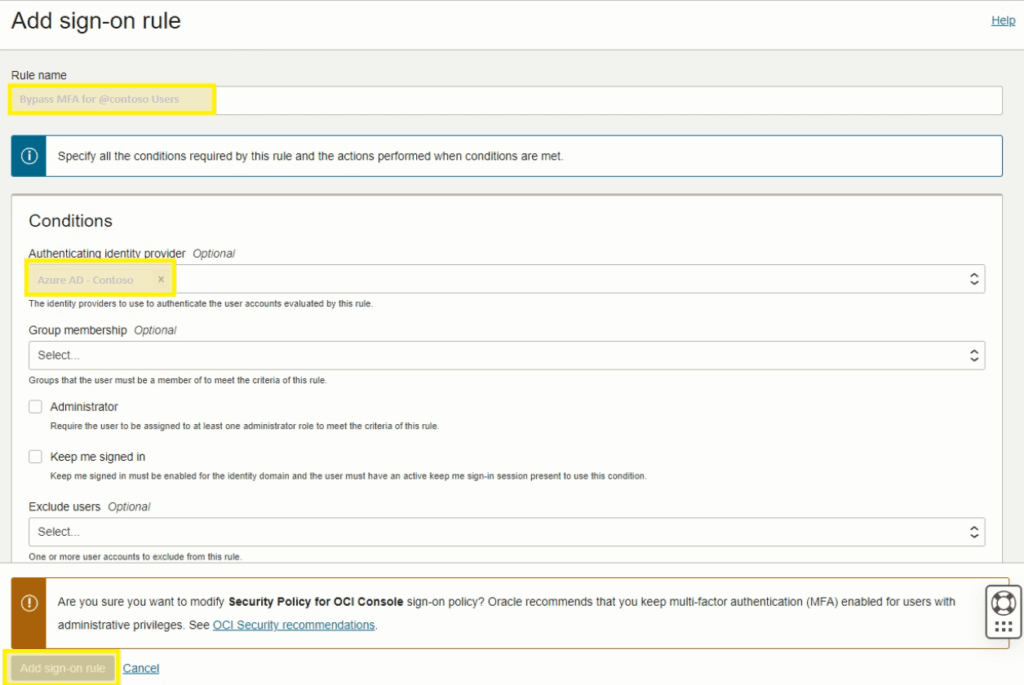
Step 13. Click Add sign-on rule.
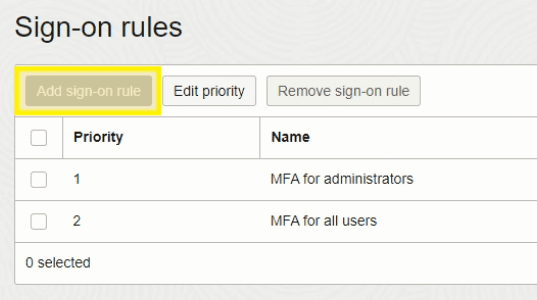
Step 14. Complete all required fields and click Add sign-on rule.
OCI should not force MFA here — MFA should be enforced on the Azure side via Conditional Access policies.
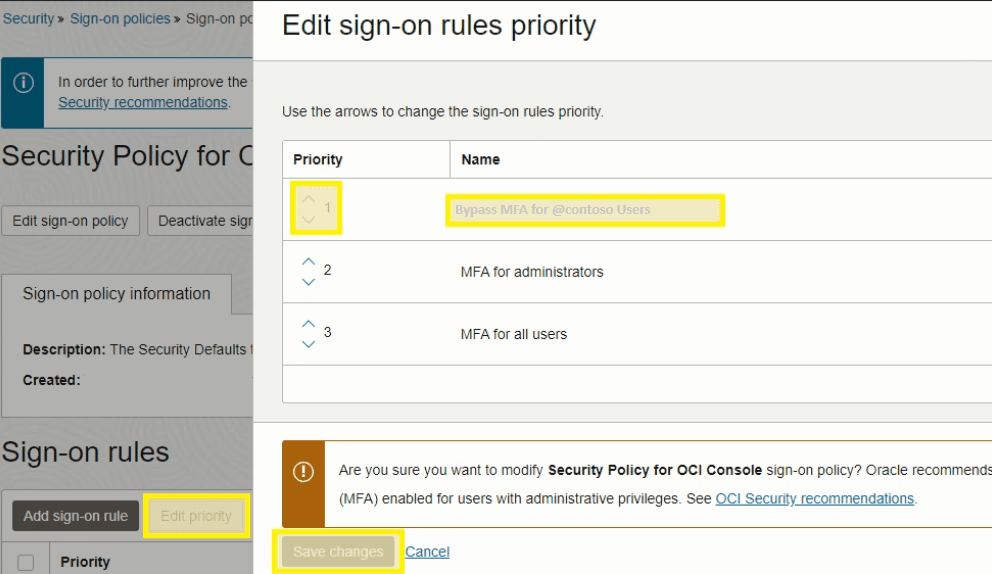
Step 15. Select Edit priority, move the new MFA policy to Priority 1, and save changes.
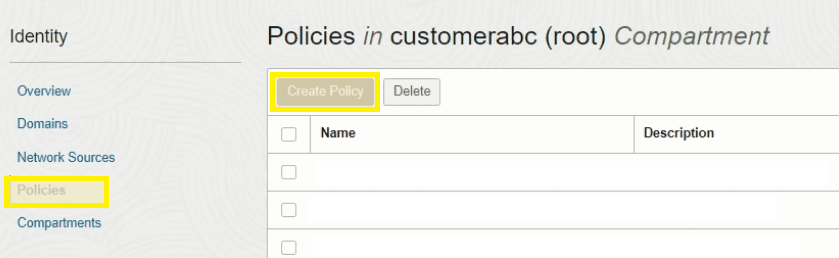
Step 16. Select Domains from the top menu, choose Policies from the left menu, and click Create Policy.
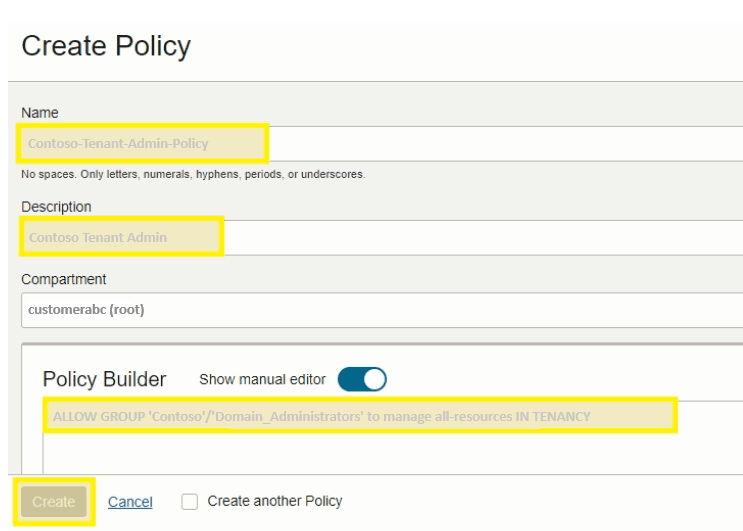
Step 17. Create the admin policy with the following details:
- Name:
Contoso-Tenant-Admin-Policy - Description:
Contoso Tenant Admin - Policy Builder rule:
ALLOW GROUP 'Contoso'/'Domain Administrators' to manage all-resources IN TENANCYClick Create.
OCI — Configure Confidential Application
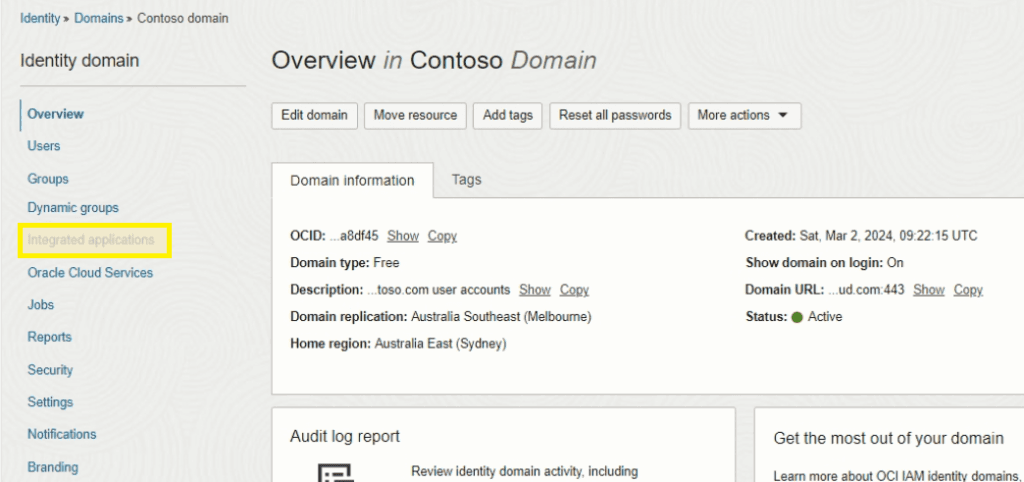
Step 1. Browse to the domain overview page and select Integrated Applications from the menu on the left.
Step 2. Select Add Application.

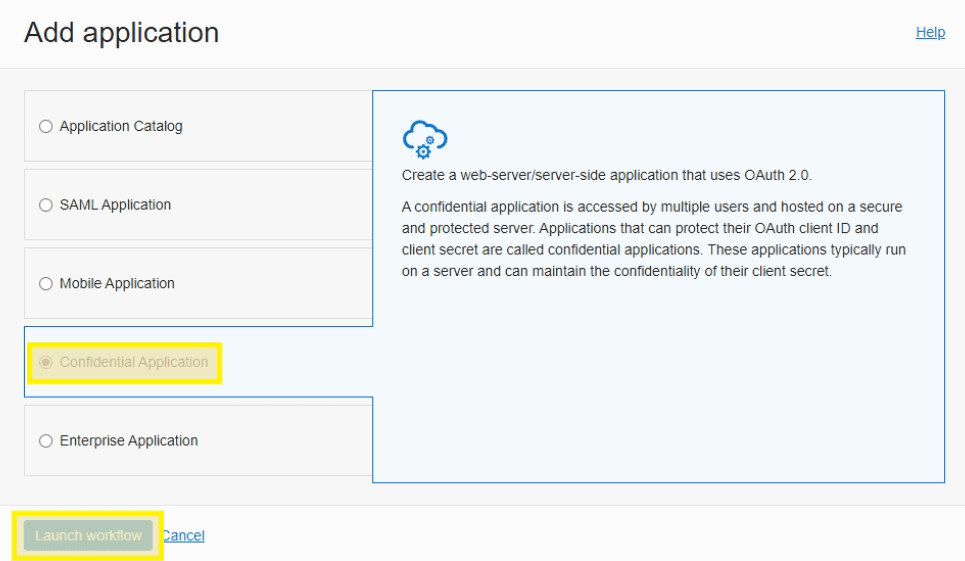
Step 3. Select Confidential Application and then Launch Workflow.
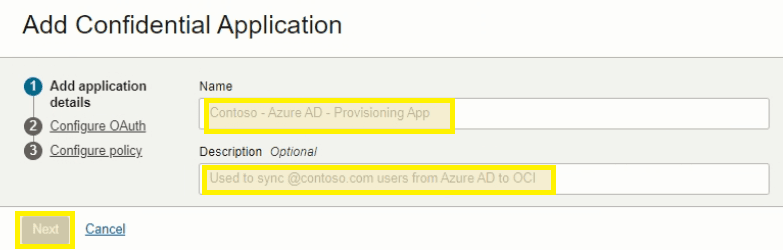
Step 4. Add a Name, Description, and click Next.
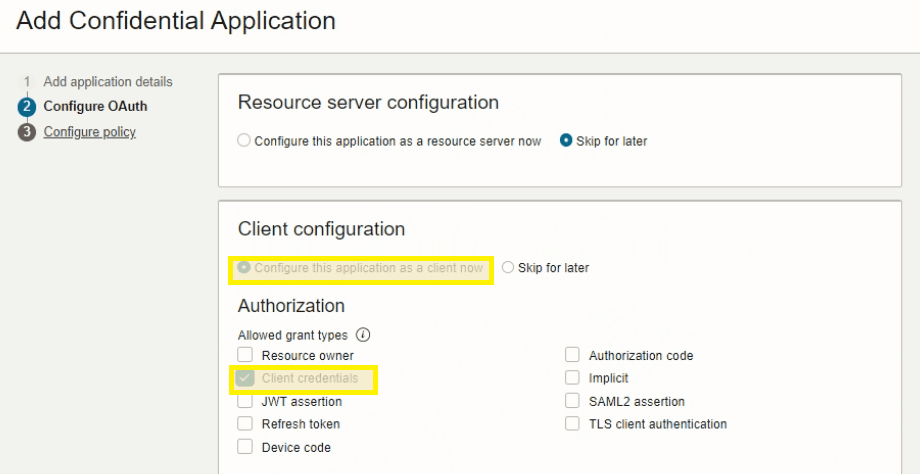
Step 5. Select and configure the following items and click Next:
- Client Configuration > Configure this application as a client now
- Authorization > Client credentials
- Authorized Resources > Specific
- Add App Roles > User Administrator
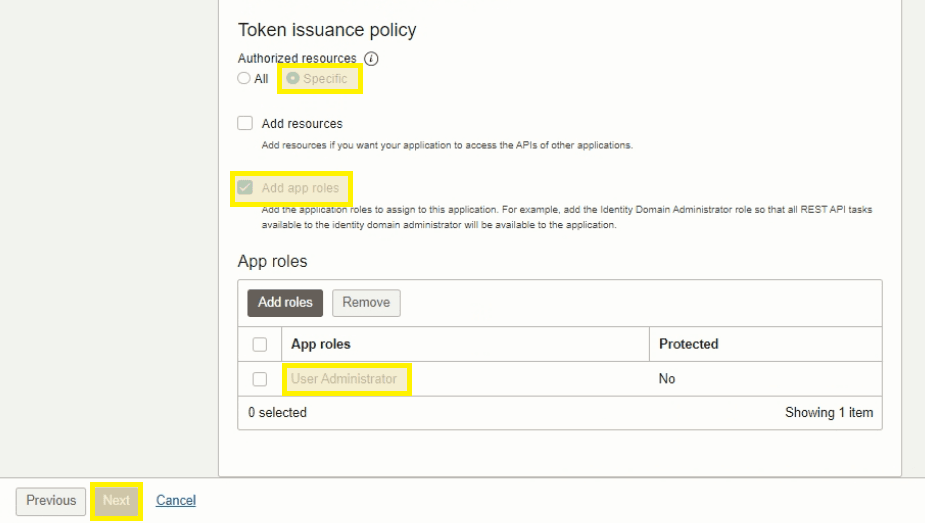
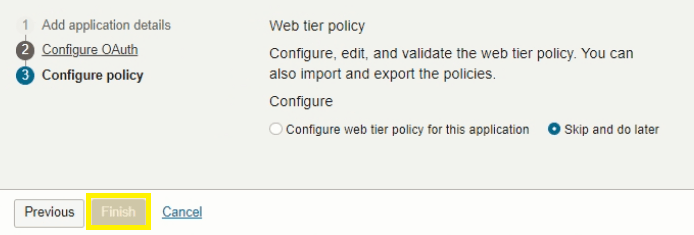
Step 6. Leave the default selections and click Finish.
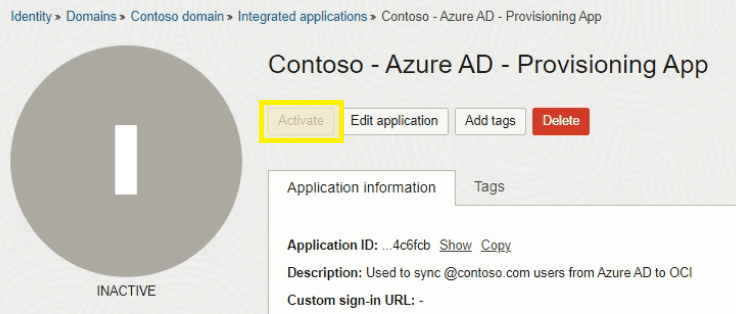
Step 7. Click Activate at the top to finalize the application.
Step 8. Scroll down to general information and copy the Client ID and Client Secret.
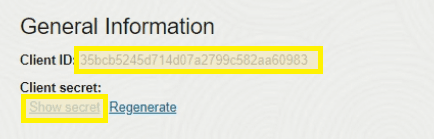
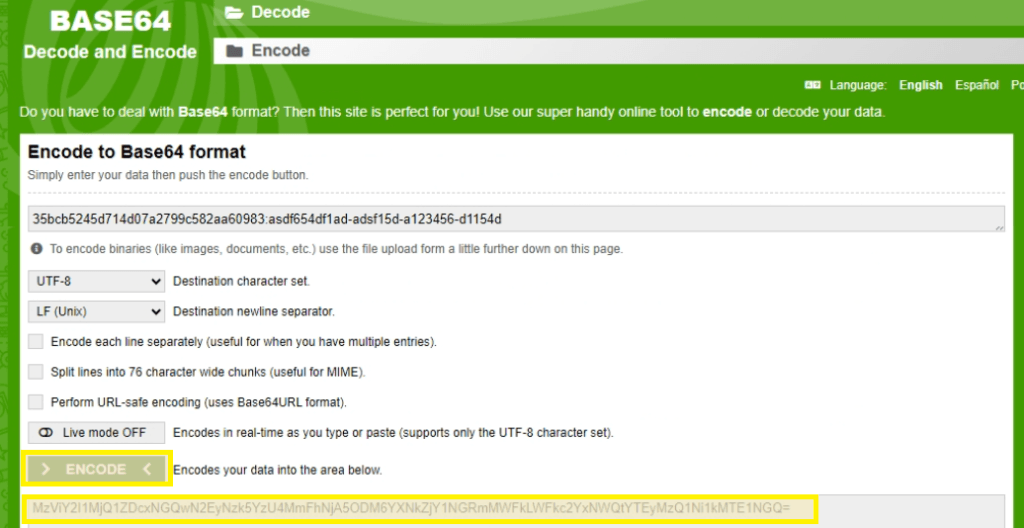
Step 9. Base64-encode the values in the format ClientID:ClientSecret. You can do this locally with PowerShell or bash — avoid pasting credentials into third-party websites.
[Convert]::ToBase64String([Text.Encoding]::UTF8.GetBytes("ClientID:ClientSecret"))echo -n 'ClientID:ClientSecret' | base64Save the encoded string for the next section.
Azure — Configure User Provisioning
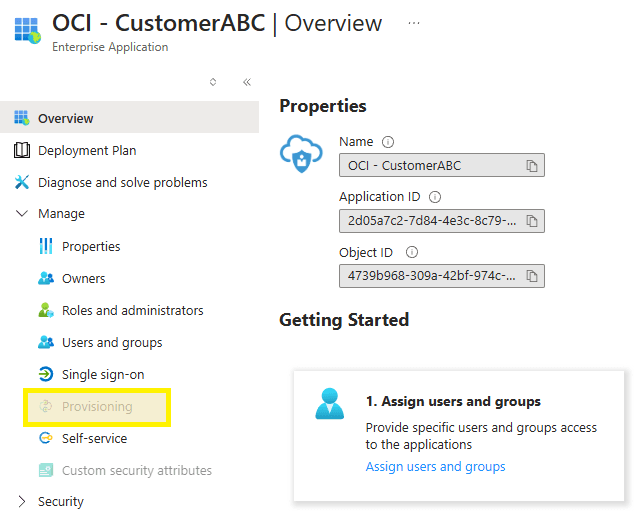
Step 1. Return to the Azure portal enterprise app, select Provisioning from the left menu, and click Get Started.
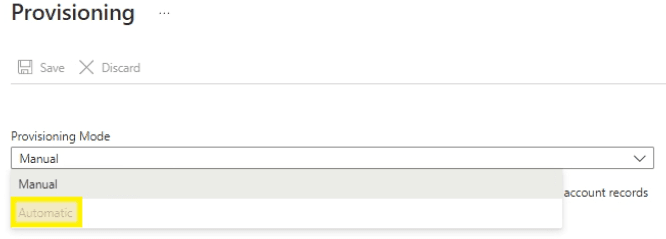
Step 2. Choose Automatic from the dropdown menu.
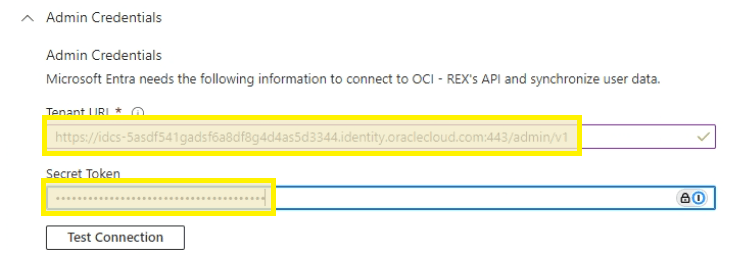
Step 3. Enter the following details, click Test Connection, and click Save once confirmed:
- Tenant URL: IDCS URL (copied previously) with
/admin/v1appended - Secret Token: Base64-encoded string (from previous step)
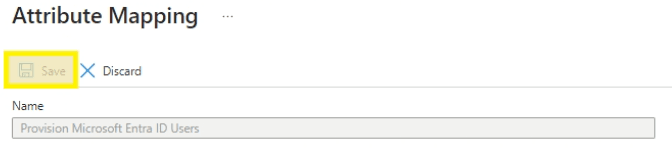
Step 4. Under Mappings, click Provision Microsoft Entra ID Users.
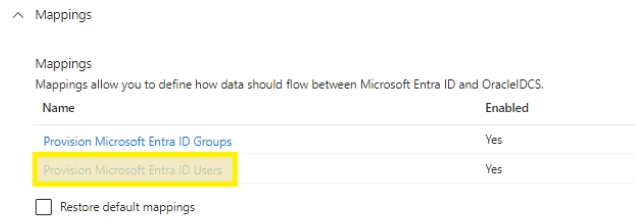
Step 5. Delete all attributes except the following (refer to the screenshot for the exact list to keep):
- userPrincipalName
- Switch([IsSoftDeleted]...)
- displayName
- active
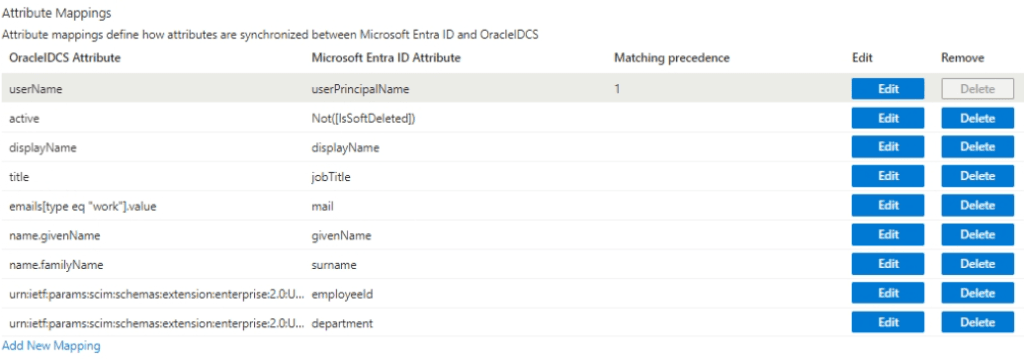
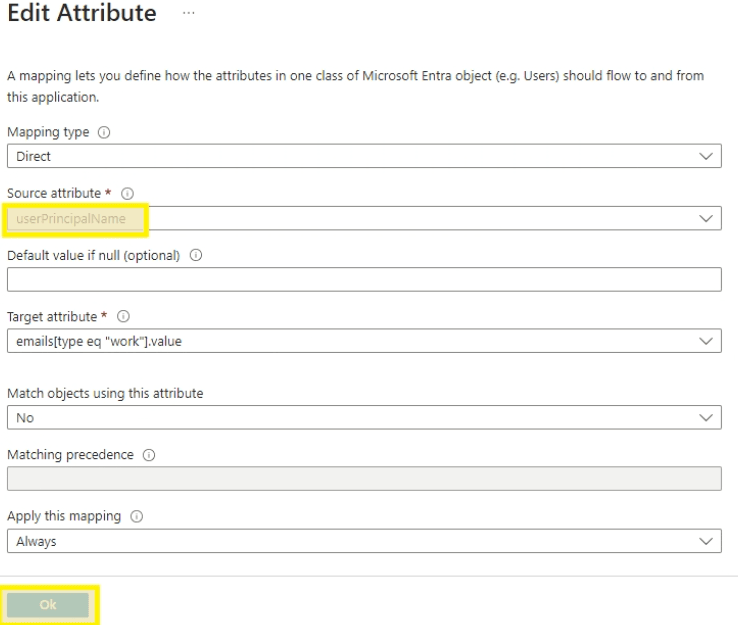
Step 6. Edit the Mail attribute.
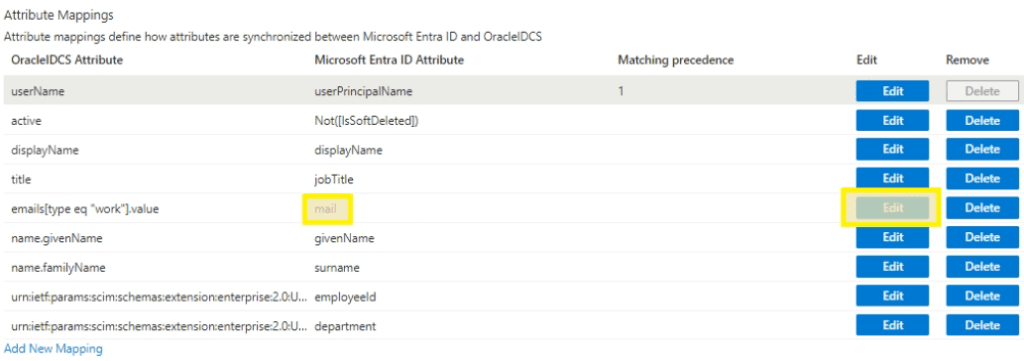
Step 7. Choose UserPrincipalName for the source attribute and click OK.
Step 8. Click Save and return to the Provisioning Overview blade.
Step 9. Click Start Provisioning to kick off the sync from Azure to OCI.
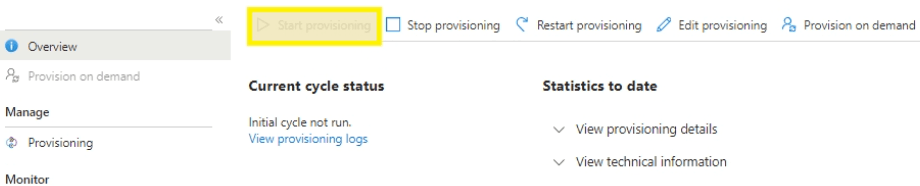
Step 10. After a few moments, click Refresh and confirm the initial sync cycle completed successfully.

Step 11. Return to the OCI portal and confirm user accounts have been provisioned. Add these users to the Domain Administrator group or create specialized policies as needed for the synced group objects to permit access to the Cloud Console.